Porsche Boxster M96 engine: Intermediate Shaft Bearing replacement
In a nutsheel
- 2003 Boxster, 2.7l M96 engine, stock
- 91K miles
- oil drip started a number of weeks prior to service
- ~1sec rattling noise at start up started at about the same time as above and became more and more frequent up to occurring at every engine start
- no other signs of problem
- Not to give away the ending but this is a happy ending story
- Not a DIY project for beginners, or even intermediate IMHO
Intro
There are a ton of blog posts about this, I am not going to replace them or repeat any of them. The purpose of this blog is to share some information I did not see anywhere else and to share some photos so you know what to expect. The best way for you to start is actually
pelicanparts.com then come back here for some tips from a DIY who has done it...successfully.
A word of caution: I am sharing this information for your knowledge. Quite frankly, I advice against doing this yourself since the risk of destroying the engine by accidentally skipping the timing chains is very much real. As they say...
Do not try this at home.
FYI: I rebuilt my first engine at 14, I can do most regular maintenance on my cars blindfolded. My dad has a mechanical engineering degree and though me a ton about cars before I could walk. I have two degrees in engineering and I have been working on engines for decades as DIY. Even at that I took a calculated risk and I quadruple checked the cam alignment to the level of paranoia since a mistake in this project is very, VERY expensive. Again, do not try this at home.
Ok, I am done with the disclaimer.
Tip 1

If your engine is dripping slowly from the place where the transmission meet the engine and/or if you hear a gentle rattling sound at start up that lasts about a 1 second, you might have my very same condition and you should have your car serviced. In my case the bearing seal clearly gave up and the high temperature grease of the sealed unit was completely gone and replaced by engine oil. I am convinced that this bearing was on its way to self destruct, I caught it just at the beginning of the process. For the record, oil should not be present inside this bearing since when this happens, the oil is basically trapped inside the bearing and it will slowly collect debris and start wearing all moving parts. It is a slow process but it will eventually result in the bearing failure and, judging from the increase in frequency of the noise above mentioned, the degrade accelerates exponentially once it starts. I bet if I waited another few weeks, this would have sounded (and looked) much worse. This unit was starting to show signs of excessive play once I removed it but, again, I did catch it in time so I had no damage. As you can see from the photo, it clearly has oil in it (seal removed) so I was sitting on a time bomb. Lastly, the noise at start up is gone. I suspect it was coming from the balls skipping and sliding in the races until they caught up with the RPM of the engine.
Tip 2


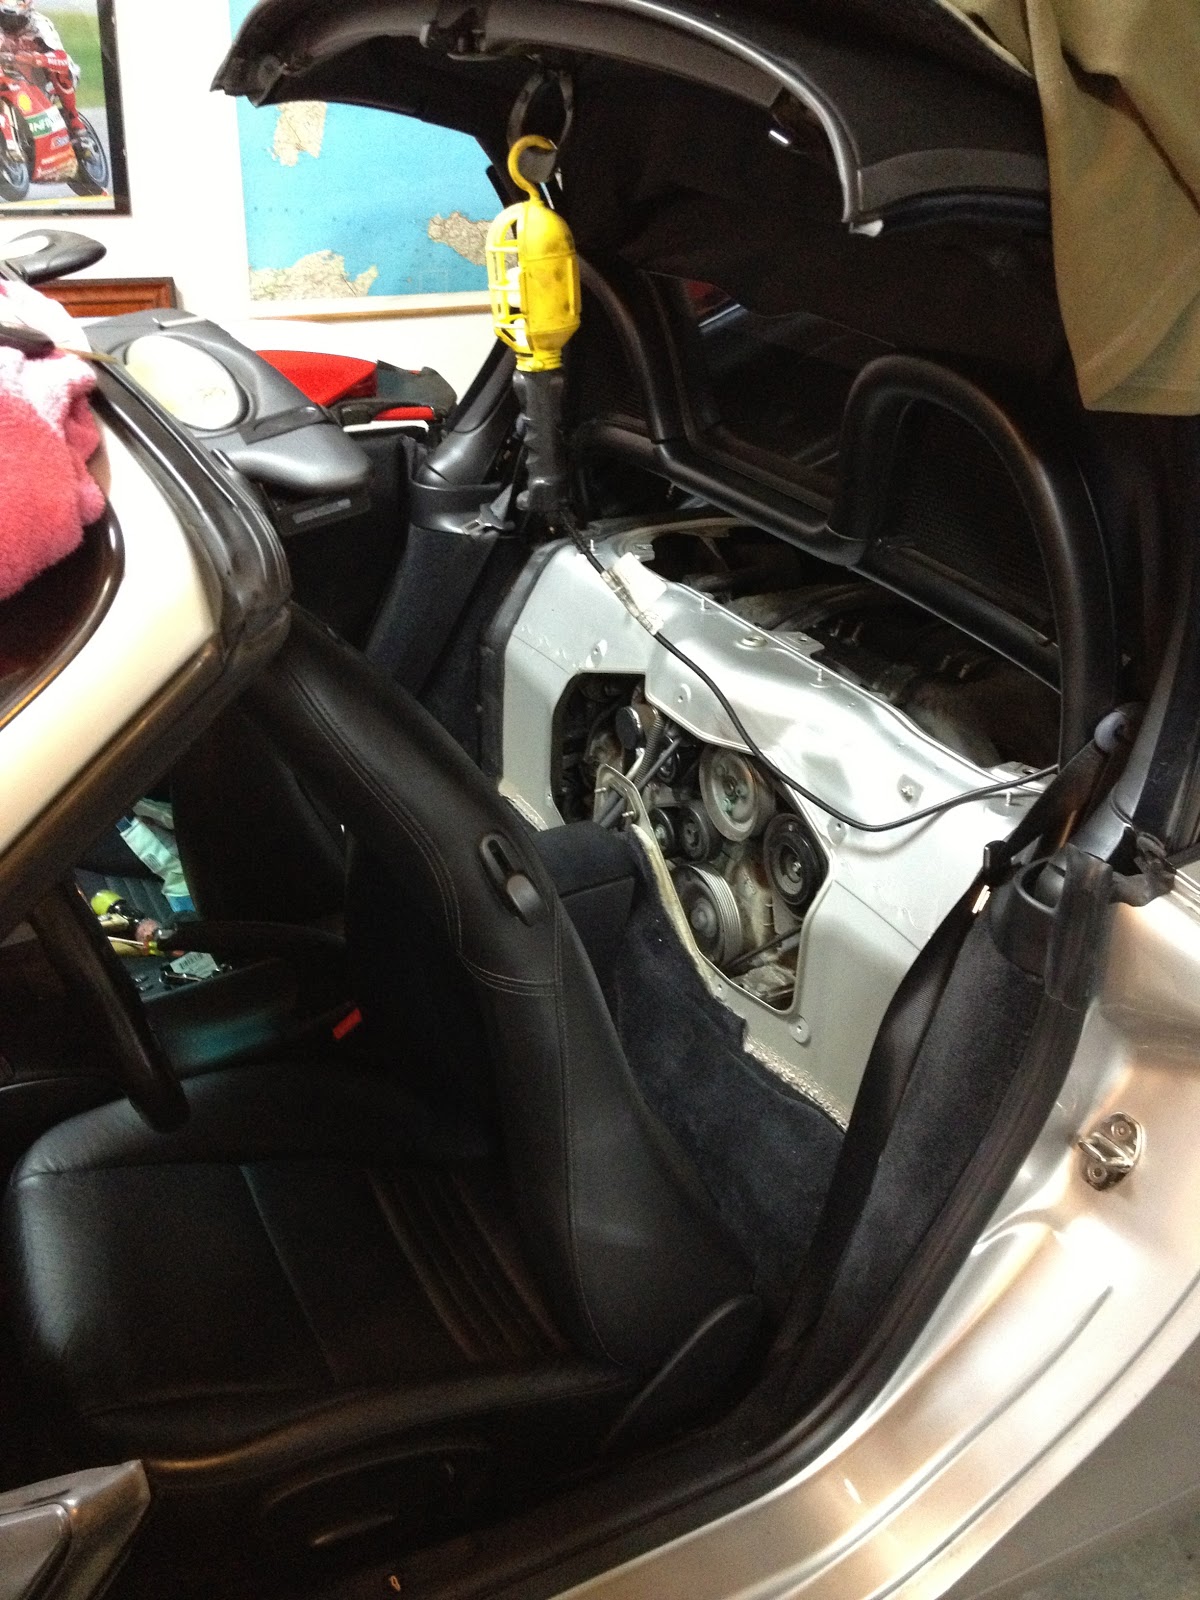
Take your time if you DIY and put every nut/bolt back where it come from loosely as you remove a part. It might be time consuming but it makes reassembly a stress free ride. I used this tip for the big bolts connecting the transmission to the engine. Not only they ARE different from one another, at some point Porsche changed what bolt was used in what hole so your engine will likely be different than some of the blog posts out there. In my case it looked like one bolt was missing. In reality, my car was assembled in the factory with different bigger bolts but they also decided to use one less than the first generation engines. Do not panic, just mark them clockwise (that is how I did it) and just put them aside. I used the triple square on the bottom left as my n.1, then went clock wise and marked each hole and each bolt with a marker and then I moved to the transmission removal step (not covered here). Here are some shots of the work in progress. It also shows the IMS cover after the replacement with T-Curil and the new sealed bolts. That takes me to the next tip.
Tip 3
Do use new bolts on IMS cover, on the pressure plate and on the flywheel. I forgot to buy the latter and de facto I had to stall my project for a few days. Learn from my mistake! In general, make sure you order everything you need ahead of time. Do not short cut, follow the instructions from a proper service document and replace everything they say to replace. This is the mechanical systems that grabs the 225Hp from the engine and transfers it to the rear wheels. It is not the right place to be
on the cheap IMHO.
Tip 4
I have read that both Porsche and the Bentley service book say that after you torque the flywheel bolts, that each need to be turn an additional 90 or 120 degrees (Bentley say the latter). I used the fact that the bolts stars have 6 tips (see close up of the inside of the bolt) so I market the position of one tip WRT the flywheel after I torqued them, then marked two tips counter clock wise from it. Then I turned the bolts as close as having the two marks meet. I did not stress about doing exactly 120 degrees since I did the process by hand and I could tell when I was getting to a similar amount of effort required to rotate them. So effectively I stretched them at least 90 but not more than 120 degrees. Again, I have driven the car several hundred miles since, for what is worth. BTW Obviously you need to use a flywheel lock when doing this, look it up.

Tip 5
Do buy a clutch alignment tool, it makes life incredibly easy during re-assembly and it is the cheaper tool you will need to buy for this project!
Tip 6
Do replace the clutch while you are in there. Not only it is a smart thing to do, it will also give you a brand new car: my original clutch was considerably harder and more difficult to manage than the new one. In the nearly ten year since the car was built they redesigned the pressure plate (despite looking identical to the old one) and it works incredibly better! It is like driving a new car.
Tip 7
Manual transmission cables do pop from their ball pins. Just be gentle and apply even amount of force on both sides of the connector and they will pop. Disconnecting and reconnecting these cables is incredibly easy. DO make sure you memorize which cable goes where. They have different length so it is straightforward but do pay attention so you do not panic during re-assembly.
Tip 8
Last but not least, I took a simple approach during disassemble: keep all the parts that came from the left side on the left side of the "pile", conversely for the right side. This way I ended up with parts lined up next to the car on either side and it was a breeze to put them back. Things like the transmission mounts (which BTW double as engine mounts so DO support the engine with floor jacks) are symmetrical. Albeit they are clearly labeled with instruction as to which side they go, I still enjoyed the approach and made the process safe and effective. Not to mention that keeping things organized methodically will let you sleep better at night and it will lower your hearth rate when you finish the job and drive the car for the first time ;-)
Tools I used (it might help you create your project list)
- full set of Torx
- full set of metric sockets
- full set of metric hex
- M10 triple square, if you do not know what it is, look it up, it is educational
- clutch alignment tool
- a 32mm socket to remove/loosen the chain tensioners
- a filter cover removal tool, hands or one-size-fits-all will not work!
- lots of WD40 to clean and lubricate all the bolts/nuts prior to loosening them. Remember you are working on parts that have been untouched for years, be gentle and let the loosening agent do its thing
- a breaker bar socket wrench
- a couple of torque wrenches of different size


 If your engine is dripping slowly from the place where the transmission meet the engine and/or if you hear a gentle rattling sound at start up that lasts about a 1 second, you might have my very same condition and you should have your car serviced. In my case the bearing seal clearly gave up and the high temperature grease of the sealed unit was completely gone and replaced by engine oil. I am convinced that this bearing was on its way to self destruct, I caught it just at the beginning of the process. For the record, oil should not be present inside this bearing since when this happens, the oil is basically trapped inside the bearing and it will slowly collect debris and start wearing all moving parts. It is a slow process but it will eventually result in the bearing failure and, judging from the increase in frequency of the noise above mentioned, the degrade accelerates exponentially once it starts. I bet if I waited another few weeks, this would have sounded (and looked) much worse. This unit was starting to show signs of excessive play once I removed it but, again, I did catch it in time so I had no damage. As you can see from the photo, it clearly has oil in it (seal removed) so I was sitting on a time bomb. Lastly, the noise at start up is gone. I suspect it was coming from the balls skipping and sliding in the races until they caught up with the RPM of the engine.
 Take your time if you DIY and put every nut/bolt back where it come from loosely as you remove a part. It might be time consuming but it makes reassembly a stress free ride. I used this tip for the big bolts connecting the transmission to the engine. Not only they ARE different from one another, at some point Porsche changed what bolt was used in what hole so your engine will likely be different than some of the blog posts out there. In my case it looked like one bolt was missing. In reality, my car was assembled in the factory with different bigger bolts but they also decided to use one less than the first generation engines. Do not panic, just mark them clockwise (that is how I did it) and just put them aside. I used the triple square on the bottom left as my n.1, then went clock wise and marked each hole and each bolt with a marker and then I moved to the transmission removal step (not covered here). Here are some shots of the work in progress. It also shows the IMS cover after the replacement with T-Curil and the new sealed bolts. That takes me to the next tip.


 I ended up replacing the whole alternator with a rebuild one but if time is not of the essence you can order the voltage regulator from Pelican Parts and save about $100 (a re-manufactured alternator should run you about $170, if you are paying more you are probably being ripped off since the VR costs about $36 retail). From what I have read it is a good idea to just put a fresh rebuild alternator instead of changing only the VR but I will leave to your taste.
 - it is a real pain to re-align the new alternator bolts, I used a strap to lift some of the weight of the alternator from the top so that it would move and rotate in place more easily.